
How to Create and Complete a Service and Repair Job
Users within a specific role have the ability to create service & repair jobs within the system.
How to Create a Service and Repair Job
Quotations for Service and Repairs are created from the Job and are populated by the Job Misc. Charges and Maintenance dataset.
- Create the Job, select Functions>Create Job.
Select Yes to continue, or No to cancel the operation.
Enter the Award date and select OK to continue.
Select OK.
Note: The Job Details screen will automatically appear.
- Select the Mobilisation Request tab, open the record(s) and select the Manifest Assets tab and view/enter the Asset Number(s) within the column shown:
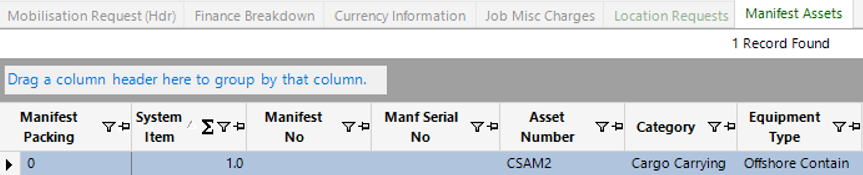
Once the Asset Numbers have been assigned to the Mobilisation Request(s), return to the Job Details screen.
- Create Maintenance record by selecting New Record>Maintenance or by selecting the Maintenance tab and hitting your Insert key on your keyboard.
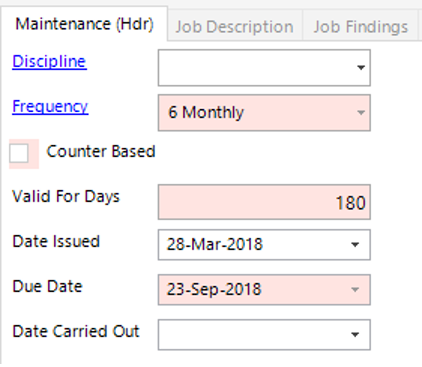
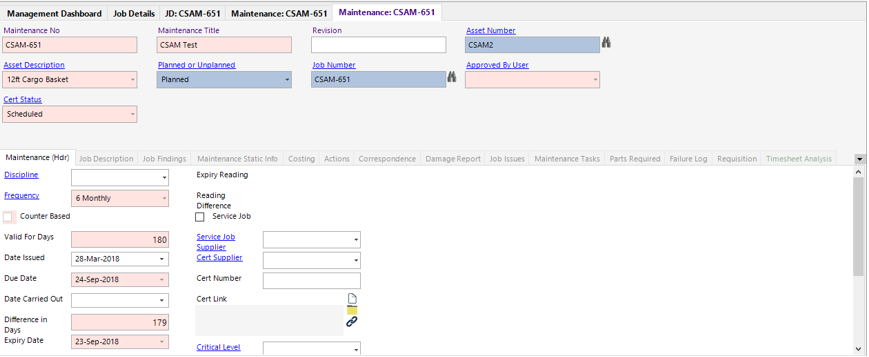
Complete the relevant fields on the Maintenance (hdr): -
Note: (Pink = System Generated, Blue = Mandatory):
| Field | Description |
|---|---|
| Maintenance Title: | Enter Service and Repair for example |
| Asset Number: | Enter the Asset Number or use the binocular lookup. |
| Planned and Unplanned: | This will default to Unplanned |
| Job Number: | This will be defaulted if added from a job record, if not Enter the Job Number manually |
| Approval By User: | This locked field will be populated when the Maintenance record is completed. |
| Cert Status: | This will default to ‘Pending’ and will be updated when the record is completed. |
| Frequency: | Entering a Frequency will set the Expiry Date. This can be used to flag to Clients that Equipment is due for a service |
| Validity: | This will be populated by the Frequency |
| Date Issued: | Date the goods are received |
| Date Due: | System generated when date issued is entered |
| Date Carried Out: | Only complete this field when the maintenance is complete |
| Service Job: | Tick box field that should be selected for Service and Repair jobs. |
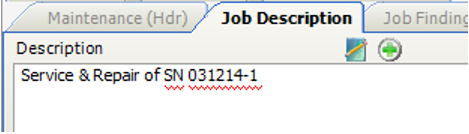
- Select the Job Description tab and enter a brief overview of the work to be carried out. This text will appear on the Maintenance Report:
- Enter the parts that are required for the service and repair. Create new Job Issues by selecting New Record>Job Issues or by using your Insert key on your keyboard.
Fill in the relevant fields:
Note: (Pink = System Generated, Blue = Mandatory):
| Field | Description |
|---|---|
| Category | Select category or select the part no to populate |
| Equipment Type | Select the equipment type or select the part no to populate |
| Our Part No | If known you can enter then number, or use the binoculars to search. |
| Qty Required | Enter the qty required to carry out the maintenance |
| Group Company | This should populate automatically, can be entered/changed if required |
| Revenue Rate BC | Enter the value you wish to quote to the client |
| Office | Select relevant Office |
| Stock Location | Select relevant stock location |
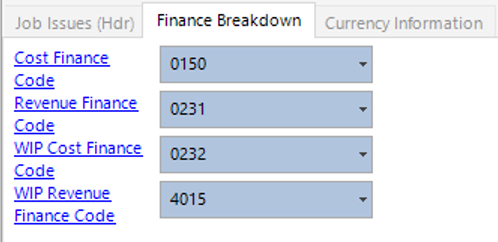
Select the Finance Breakdown tab to view/assign the relevant finance codes:
If additional items are required, select Next and complete the fields required. Select Close when all job issues have been assigned, select Refresh to populate the grid to view each record added:

- Enter the Maintenance Tasks. (See How to Add and Complete Adhoc Maintenance and How to Create a Maintenance Template User Guides for more information):

- If any 3rd party spares/services are required you can create a Requisition against the job, see the following user guides for help:
How to Raise a Requisition
How to Review a Requisition and Request Approval
How to Approve a Requisition
How to Raise and Send a PO
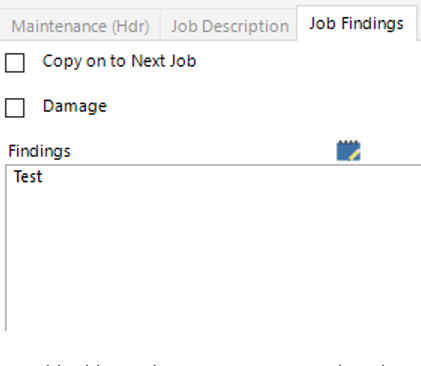
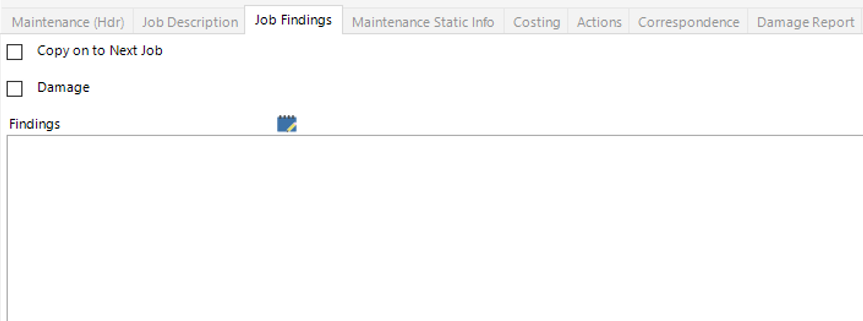
- Select the Job Findings tab to enter a description which will appear on your Maintenance Report and Quotation:
To add additional Maintenance records, select Next from the toolbar. You should have a Maintenance record for each Asset on the Job.
- Once all information has been added to the job, you can print/email the quotation to submit to the client if required. Make sure you review the quotation to verify all charges you have applied to the job have pulled through.
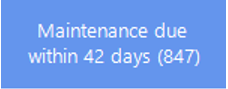
- All Maintenance records to be actioned will be accessible to users within the Asset Maintenance role within their User Dashboard.
How to Update a Service and Repair Job
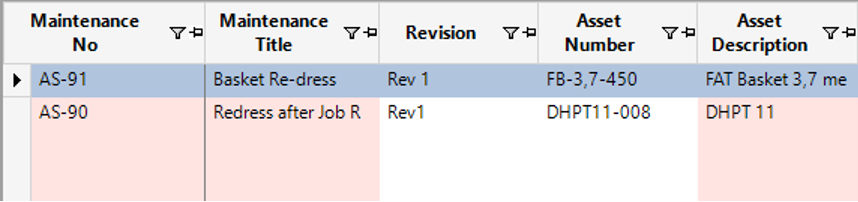
- You can locate the Maintenance records to be actioned by either selecting the Dashboard button which will show for users within the Asset Maintenance role, or by locating the Job and selecting the Maintenance tab:
- Open the relevant records and enter the Date Carried Out on the Maintenance (Hdr) tab.
- Go to the Job Findings tab and view/enter details of the job results if required:
- Go to the Job Issues tab, open up each record or select Open All, select the Bin Issue tab:
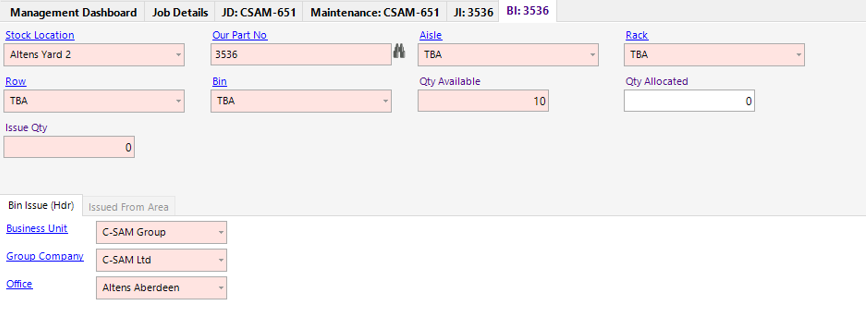
Enter the Qty Allocated.
- Select Refresh, all parts should change from Red to Yellow:

- Select Functions>Complete Issue from the toolbar, the colour will now change from Yellow to Green and this will update the Issue Qty column.
- Go to the Maintenance Tasks tab.
You can Open All and select the Completed checkbox, save and close, or, check the completed box within the grid view as shown:

- If 3rd party spares/services have been used, complete the requisition details. See How to Raise a GRN user guide for help receipting in the goods.
- Once all maintenance items have been completed, spares assigned etc. Select Functions>Complete Record.
Select Yes to continue or No to cancel the operation.
Select OK.
The Maintenance record will now lock.
A new Maintenance record with a status of Scheduled will be added. This is to be carried out the next day after the newly completed Maintenance record has expired (Due Date).
- Repeat Steps 3 to 14 for each Asset on the Job Proceed to How to Create and Complete a Manifest user guide to complete the Service & Repair job.