
How to Raise a Requisition & Submit for Review/Action
Requisitions can be logged in the C-SAM system for tracking.
How to Raise a Requisition
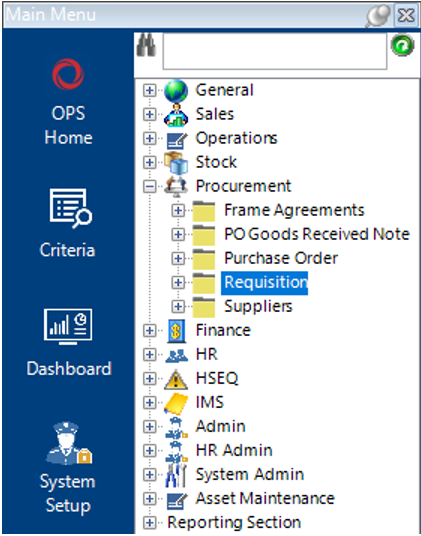
- Go to the Procurement category and select Requisition.
- Select New Record>Requisitions or hit Insert on your keyboard to create a new record.
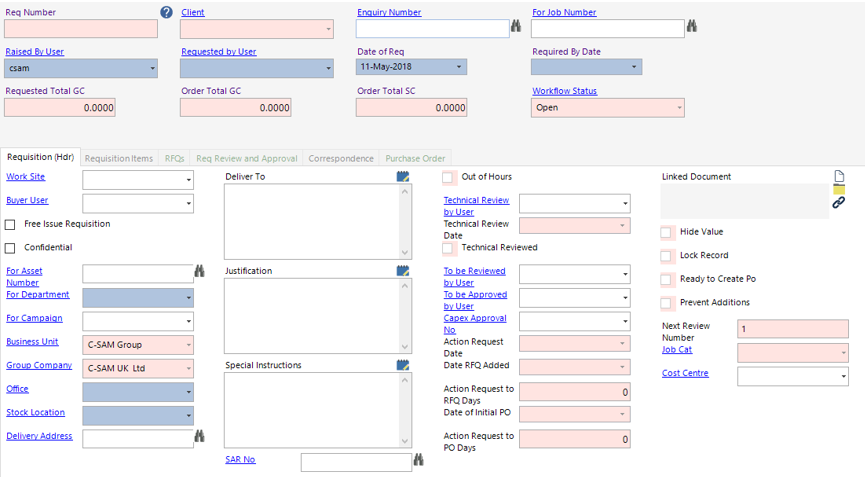
- Complete the relevant fields on the Requisition (hdr).
Note: (Pink = System Generated, Blue = Mandatory):
| Field | Description |
|---|---|
| Enquiry Number | Defaulted if created within the Enquiry record, enter or use binocluars to search for relevant number if required. |
| For Job Number | Enter or use the binoculars to assign the relevant Job Number |
| Raised by User | Defaulted to the user logged in. Can be changed |
| Requested by User | Select the relevant user |
| Date of Req | Defaulted to today’s date, can be changed |
| Required by Date | Enter/Select the relevant date the goods are required by |
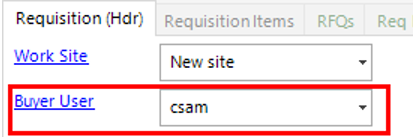
| Work Site | Defaults from the Job Number if specified |
| Buyer User | Select the relevant user |
| Free Issue Requisition | If goods are issued by a supplier with no cost verified at the time of the order, enabling this tickbox will not demand a value to be entered by the system |
| Confidential | Enabling this checkbox means that only the ‘Added User’, ‘Requested by User’ ‘Buyer User’ and ‘Approved by User’ will see the requisition |
| For Asset Number | Users can link a requisition to a specific Asset Number if required, enter or use the binoculars to search for the number |
| For Department | Select the relevant department from the drop down menu |
| For Campaign | Enter the relevant Campaign number if required |
| Office | Select the relevant Office |
| Stock Location | Select the relevant Stock Location |
| Delivery Address | Use the binoculars to search for the relevant delivery address. This will also update the ‘Deliver to’ field |
| Deliver To | Text Field to enter the delivery address |
| Justification | Text field to explain justification for purchase |
| Special Instructions | Text field for additional instructions |
| SAR No | Service Action Request (SAR), the user can link the requisition to an SAR within the NCR dataset if required |
| Technical Review by User | Select the relevant user if the goods require technical review |
| To be Reviewed by User | Select the relevant user if the goods require review |
| To be Approved by User | Select the relevant user who will approve the requisition |
| Capex Approval No | Select the relevant Capex Approval No if required |
| Linked Document | The user can link a file/folder or webpage to the Requisition if required |
| Cost Centre | Select the relevant Cost Centre from the drop down menu if required |
Select Save and you will now see that the Req Number field has generated a unique ID.
Note: Closing or moving to another tab will save the record automatically unless the blue mandatory fields have been missed.
- To add Items to your requisition, you can either select New Record>Requisition Items or select the Requisition Items tab and hit Insert on your keyboard.
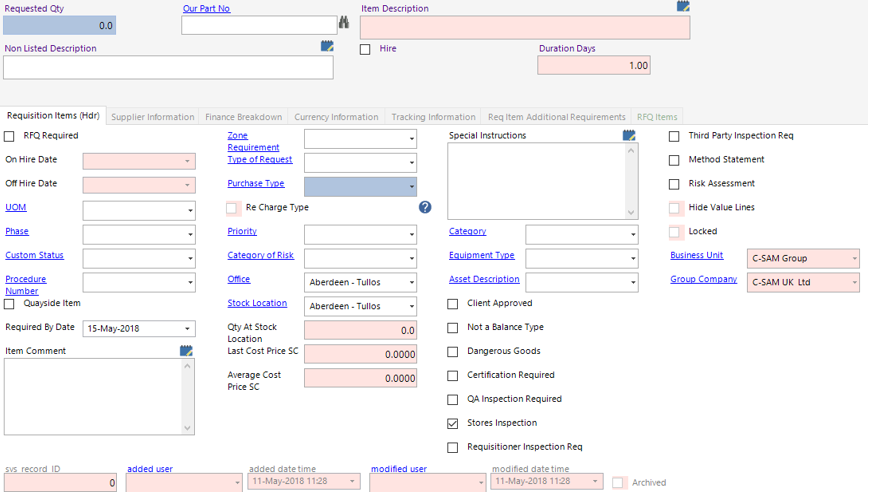
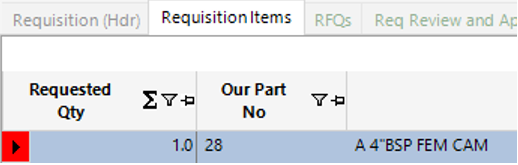
Complete the relevant fields on the Requisition Items (hdr).
Note: (Pink = System Generated, Blue = Mandatory):
| Field | Description |
|---|---|
| Requested Qty | Enter a value of the qty required |
| Our Part No | Enter or use the binoculars to search for relevant Part No if ordering Stock, Leave this field blank if ordering Assets |
| Non Listed Description | Manually enter the description of the goods required, these would be classed as Non Stock Items, leave this field blank if ordering Assets |
| Hire | Enabling this tickbox means that you will be hiring the goods from the Supplier |
| Requisition (Hdr) | |
| RFQ Required | Request for Quote (RFQ), enabling this checkbox means that you require quotes from multiple suppliers to receive best rates, delivery times etc. |
| UOM | Unit of Measure (UOM), select the relevant UOM from the drop down if required |
| Phase | Select the relevant phase from the drop down if required |
| Custom Status | Select the relevant Custom Status if required |
| Procedure Number | Select the relevant procedure number if required |
| Quayside Item | Enabling this tickbox means that the goods will need to be delivered directly to the quayside or client site |
| Required by Date | Enter/Select the relevant date the goods are needed by |
| Item Comment | Text field to note additional information |
| Zone Requirement | Select the relevant zone if required |
| Type of Request | Select the relevant type from the drop down if required |
| Purchase Type | Select the relevant type from the drop down if required |
| Priority | Select the relevant priority level for the item |
| Category of Risk | Select the relevant category if a risk assessment is required |
| Special Instructions | Text field to add additional information |
| Category | If the requisition if for buying assets, select the relevant category |
| Equipment Type | If the requisition if for buying assets, select the relevant equipment type |
| Asset Description | If the requisition if for buying assets, select the relevant description |
| Client Approved | Enabling this tickbox means that the client will need to approve the Requisition item |
| Not a Balance Type | This is set by the system and is based on the type of stock |
| Dangerous Goods | This is set by the system and is based on the type of stock |
| Certification Required | Enabling this tickbox indicates you require a certificate from the supplier for the item |
| QA Inspection Required | Enabling this tickbox indicates that you need QA to inspect the goods |
| Stores Inspection | Enabling this tickbox indicates that you need stores to inspect the goods |
| Requisitioner Inspection Req | Enabling this tickbox indicates that you need the requisitioner to inspect the goods |
| Third Party Inspection Req | Enabling this tickbox indicates that you need a 3rd party to inspect the goods |
| Method Statement | Enabling this tickbox indicates that a method statement is required |
| Risk Assessment | Enabling this tickbox indicates that a risk assessment is required |
Select Save from the toolbar.
- Within the Supplier Information tab, you will need to fill in the Pref Supplier and/or Quote 2 Supplier (if RFQ required) and/or Quote 3 Supplier (if RFQ Required).

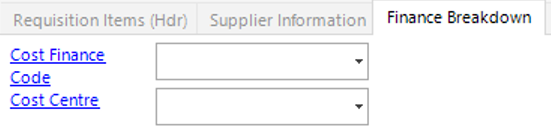
Now go into the Finance Breakdown tab and select the relevant Cost Finance Code and Cost Centre from the drop down menus:
If you have more than 1 requisition item, you can select the Next button.
Once you have added the requisition items required, close the tab, select Refresh you will see the items populate in this screen view.
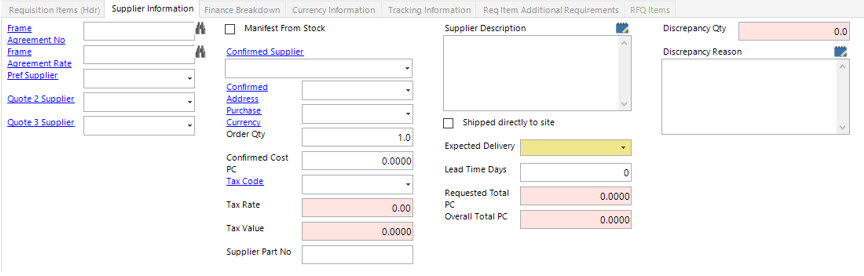
- If you have supplier and price details you can update the Supplier Information, within the Requisition Items tab select Open All, now go to the Supplier Information tab and fill in the fields required.
Note: (Pink = System Generated, Blue = Mandatory):
| Field | Description |
|---|---|
| Frame Agreement No | If required, you can assign a Frame Agreement No either by manually typing in the number or using the binoculars to search for the relevant one. |
| Frame Agreement Rate | If required, you can assign a Frame Agreement Rate either by manually typing in the number or using the binoculars to search for the relevant one. |
| Pref Supplier | Using the drop down, select the supplier name you wish to purchase the goods/services from. |
| Quote 2 Supplier | Only required if using RFQ option. |
| Quote 3 Supplier | Only required if using RFQ option. |
| Confirmed Supplier | From the drop down, select the supplier name you wish to purchase the goods/services from |
| Confirmed Address | From the drop down select the address of the supplier selected. |
| Purchase Currency | From the drop down select the currency you will use to pay the Supplier selected. |
| Order Qty | This will automatically update from the Requisition Item (Hdr) Tab, however can be amended in this field. |
| Confirmed Cost PC | PC = Purchase Cost, enter the unit cost of the item you are purchasing from the supplier. |
| Tax Code | If required, select a tax code from the drop down menu. |
| Supplier Part No | Manually enter the part number used by the Supplier. |
| Supplier Description | This is an open text field and can be used to record the supplier description if different from the Item Description set up in the system. |
| Shipped Directly to Site | If this tick box is checked the delivery address will now be the ‘Worksite’ rather than the ‘Deliver To’ address. |
| Expected Delivery | From the diary, select the expected delivery date. |
| Lead Time Days | Manually enter the amount of days until you will be in receipt of the goods/services. |
| Discrepancy Reason | This field allows you to enter a reason for the discrepancy from the Qty Required and Order Qty, i.e. supplier availability. |
- If you require a Buyer to action a Requisition, you will need to pick a Buyer User on the Requisition (Hdr):
- Select Functions>Request Action.
Select OK.
- Once the Buyer has completed the Action Review, select Functions>Request Review, this should only be used if the Supplier and Price information has been entered.
The To be Reviewed by User will now receive and email and notification that they are responsible for reviewing the requisition record.