
How to Create and Complete a Manifest
Users within specific roles have the ability to create and complete a manifest.
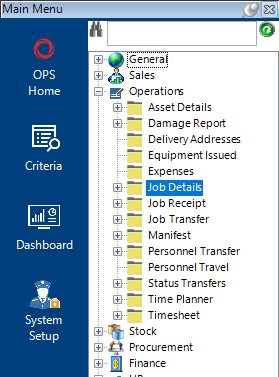
Locate the Job
- Go to the Operations category folder in the main menu and select Job Details:
- If the Job Number is known enter this number into the Job Number field and either select Search from the toolbar or hit enter on your keyboard the results will appear on the bottom half of the screen as shown:
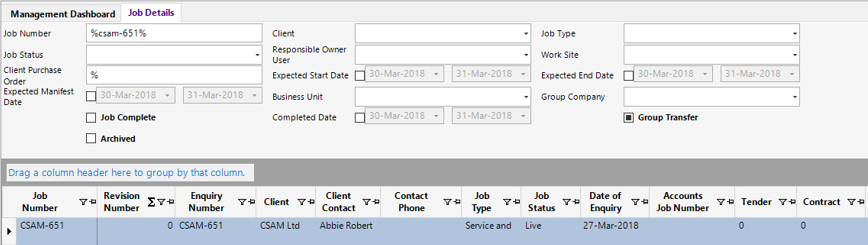
- If the job number is not known, enter as much criteria as possible within the search fields to narrow your search. Either select Search from the toolbar or hit the Enter button on your keyboard to return the results.
Once you have located the required job number, double click on the grey box to the left of the Job Number to open:

How to Create and Complete a Manifest
- From the toolbar, select Functions>Create Manifest, a dialog box asking if you want to continue will appear.
Note: Depending on your system configuration, there may be additional checks prior to the manifest being created, i.e. FAT etc.
Select Yes to continue, another dialog box will appear informing you that the manifest has been created.
Select OK.
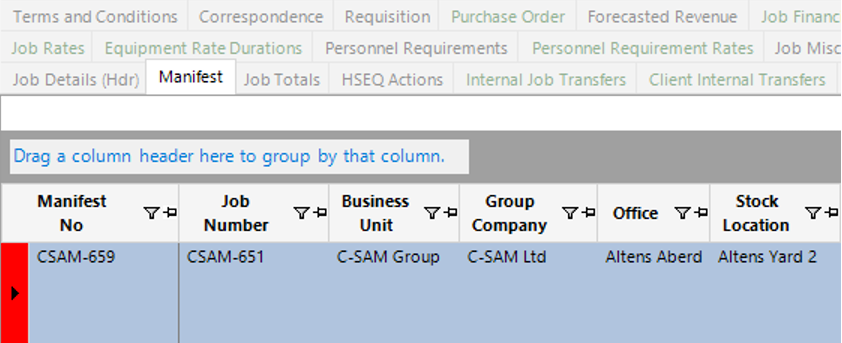
- From the Job Details dataset, select the Manifest tab, and open the record(s) either individually or by Open All from the toolbar:
Fill in the relevant fields.
Note: (Pink = System Generated, Blue = Mandatory):
| Field | Description |
|---|---|
| Asset Status | The status populated in this field will update the Asset Status against the Asset Details record. This field is controlled by the Manifest Type |
| Consignor | This is the person responsible for shipping the goods |
| Consignee Address | This field can be used to select locations which are not tied to a client, i.e., Quayside |
| Consignee | This will automatically populate when a Consignee Address has been selected from the look up menu, however this field can be manually updated if required |
| Ship To Address | This field can be used to select locations which are not tied to a client, i.e., Quayside |
| Ship To | This will automatically populate when a Ship To Address has been selected from the look up menu, however this field can be manually updated if required |
| To Business Unit | Only required for Internal Transfers |
| To Group Company | Only required for Internal Transfers |
| To Office | Only required for Internal Transfers |
| To Stock Location | Only required for Internal Transfers |
| Shipping Notes | This is a text field and can be used for any additional notes required for the shipping process |
| Carrier | Enter the name of the shipping agent (if applicable) |
| Delivery Method | Enter the delivery method (if applicable), Road/Sea/Air etc. |
| Airway Bill Number | Enter the unique airway bill reference number (if applicable) |
| Airway Bill | A link to the airway bill file/folder/webpage can be added |
| Agents Reference | If the shipping agent has a unique reference, the number can be entered into this field |
| Commercial Inv Currency | Drop down selection for the currency required on the commercial invoice |
| Total Volume | Overall Weight |
| Total Freight Value SC | Overall Value of goods |
| Destination Country | Automatically pulls through from enquiry/job if entered, however, this field can be manually updated from the drop down menu |
| Export Licensable | Select the relevant export license for the selected destination country and goods (if applicable) |
| Procedure Code | Enter the procedure code (if applicable) |
| Permit | Enter the permit (if applicable) |
| Show Internal Components | If this tick box is enabled, assets that have been set up as "Internal Component" within the Asset Details will be printed on the shipping documents. |
| Expected Manifest Date | Defaulted from the Job, otherwise select the date |
| Expected Return Date | Defaulted from the Job, otherwise select the date |
| Actual Manifest Date | Select the date the goods are physically manifested. Only enter this date when performing the Complete Manifest function |
| On Hire Date | Select the date the goods will be charged from. Only enter this date when performing the Complete Manifest function |
| Minimum Cert Dates | This field will automatically populate when the Check Assets for Manifest function is run. It will show the amount of days available until the earliest due date of an asset being manifested. |
| Our PO Number | Enter an internal PO reference (if applicable) |
| Client Ref PO No | Enter the customer’s PO/Reference number |
| Client Contact | Defaulted from the Job Details |
| Client Project | Enter the project name (If applicable) |
| Notes | This is a text field and can be used to record any additional notes if required |
| Dangerous Goods Declaration | A link to a file/folder/website page can be held here |
| Mobilised | This checkbox will update automatically when the manifest has been completed |
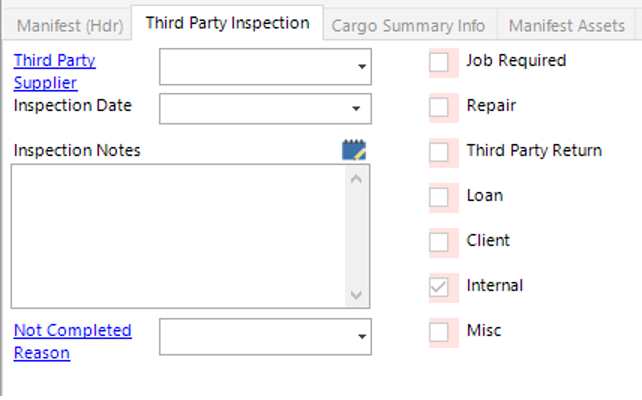
- Select the Third Party Inspection tab and add any information required (The tick boxes will be set by the system based on the job type selected):
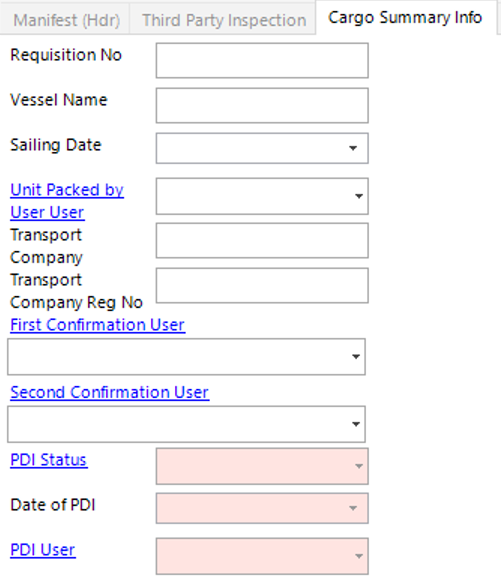
- Select the Cargo Summary Info tab and add any information required:
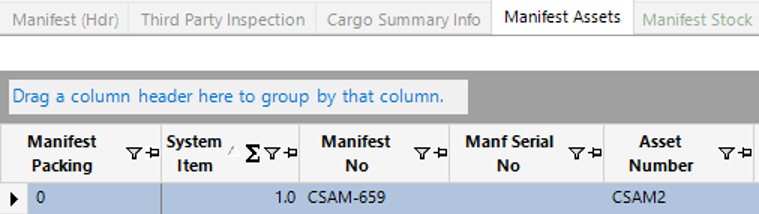
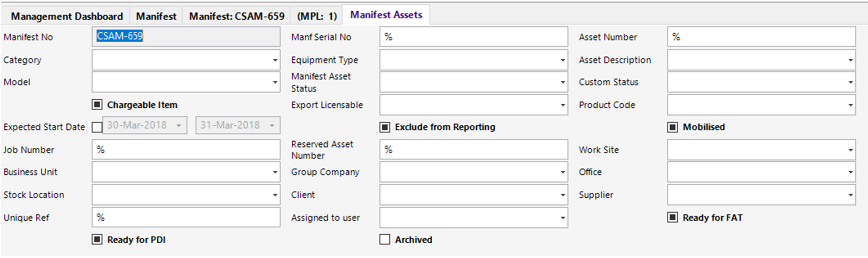
- Select the Manifest Asset tab to view the record(s):
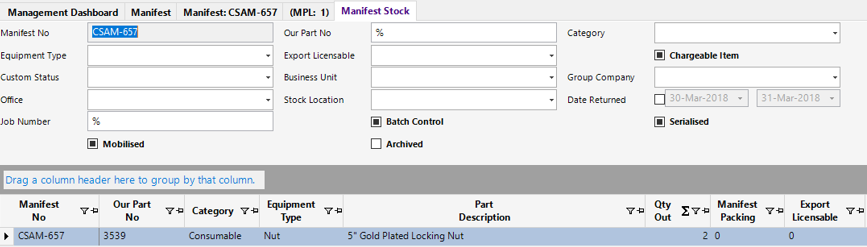
- Select the Manifest Stock tab to view the record(s):

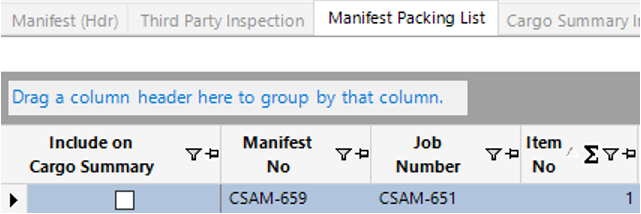
- Select the Manifest Packing List tab, packing lists will be created automatically in this tab if the Asset Detail has been set up with ‘Include on Packing List’:
How to set up a Manifest Packing List
- Select New Record>Manifest Packing List or hit Insert on your keyboard.
Fill in the relevant fields.
Note: (Pink = System Generated, Blue = Mandatory):
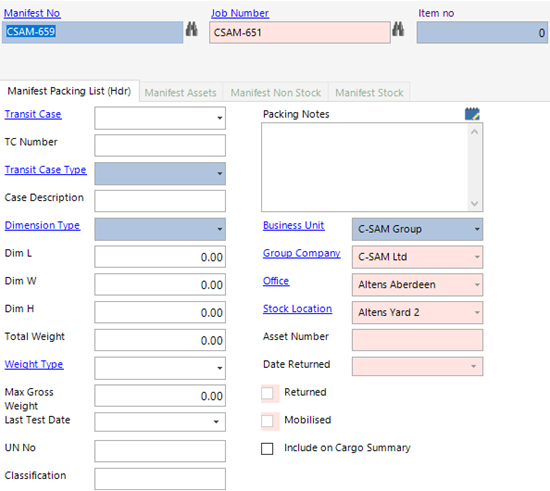
| Field | Description |
|---|---|
| Item No | Enter the Item Number, this will show on the shipping documents |
| Transit Case | Select a transit case (if applicable) |
| TC Number | Enter a TC Number (if applicable) |
| Transit Case Type | Select a transit case type, i.e., Crate, Pallet etc. |
| Case Description | Enter the case description. This text will show on the shipping documents |
| Dimension Type | Select the unit of measure, i.e., kg, tons etc. |
| Dim L | Length |
| Dim W | Width |
| Dim H | Height |
| Total Weight | Total weight of the shipment |
| Weight Type | Select the relevant weight type, i.e., Ton/Kg/Lbs |
| Max Gross Weight | Enter the gross weight of the case type |
| Last Test Date | If the TC type is one which is required to be certified, you must enter the last known test date into this field |
| UN No | Enter the UN number (if applicable) |
| Classification | Enter the classification number/ref (if applicable) |
| Packing Notes | This is a text field for additional notes |
| Business Unit | Defaulted from the Job |
| Group Company | Defaulted from the Job |
| Office | Defaulted from the Job |
| Stock Location | Defaulted from the Job |
| Asset Number | Defaulted from the Job |
| Date Returned | Defaulted from the Job |
| Returned | Locked Checkbox, will automatically update when goods are returned (if applicable) |
| Mobilised | Locked checkbox, will automatically update when manifest is Completed |
| Include on Cargo Summary | If this checkbox is ticked, the information on this tab will show on the cargo summary |
How to Allocate Assets/Stock/Non Stock to a Packing List
- From the Packing List Info Screen, select Functions>Select Manifest Assets. This will open the Manifest Assets search screen and will show all Assets on the job:
Select the row(s) for the required Assets and select Close.
Select Yes to continue or No to cancel the operation.
- From the Packing List Info Screen, select Functions>Select Manifest Stock. This will open the Manifest Stock search screen and will show all Stock on the job:
Select the row(s) for the required Stock and select Close from the toolbar.
Select Yes to continue or No to cancel the operation.
Note: Non Stock can be added to a Manifest the same way as Assets and Stock.
- Once all information has been updated on the Manifest (Hdr) and relevant tabs you can print the following documents by selecting Print from the toolbar and selecting the relevant option from the drop down menu:
| Option | Description |
|---|---|
| Delivery Note | |
| Commercial Invoice | |
| Packing Label | |
| Cargo Summary | Information from this report is populated from the Cargo Summary Info and Cargo Checklist tab |
| Current Certs | |
| Stock MSDS Sheets |
Note: Based on your configuration, it may be required to complete a PDI from the Functions. This would remove any watermarks on the reports if they exist.
- Select Functions>Complete Manifest from the toolbar.
Select Yes to continue or No to cancel the operation.