
How to Raise and Send a PO
Once a requisition has been raised and approved, the user has the ability to convert this into a purchase order.
How to Raise a PO
You must create and have approval on a requisition before you can raise a PO.
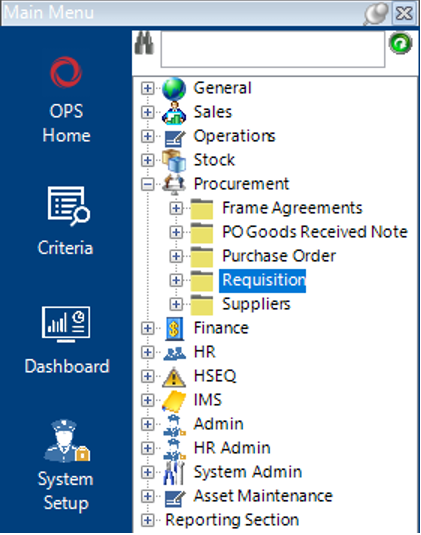
- Locate the requisition number by selecting the Procurement category and then Requisition.
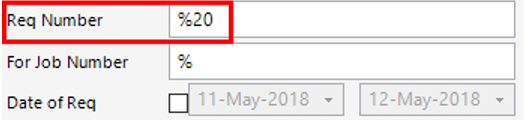
If you know the requisition number, type this into the Req Number field and select Search or hit Enter on your keyboard, the search screen will look like this:
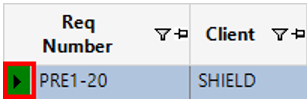
The grid view will look like this:

The green colour code indicates that this requisition has been approved and can now be converted into a PO.
If you do not know the requisition number, enter as much criteria into the search fields as possible to narrow down your search.
Once you have located the requisition you need, double click on the box to the left of the Req Number:
- Once you are in the record, select Functions>Create Purchase Orders.
You will be asked if you want to continue.
Select Yes, then click OK.
When there are no items left on the requisition you will be asked if you want to close it.
Select Yes.
Note: The fields will now turn pick indicating that the requisition is closed.
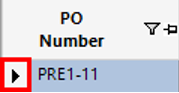
- To open the PO, still within the Requisition dataset, select the Purchase Order tab:

You will see that there is now a record showing in here, to open the PO, double click on the grey box to the left of the PO Number field:
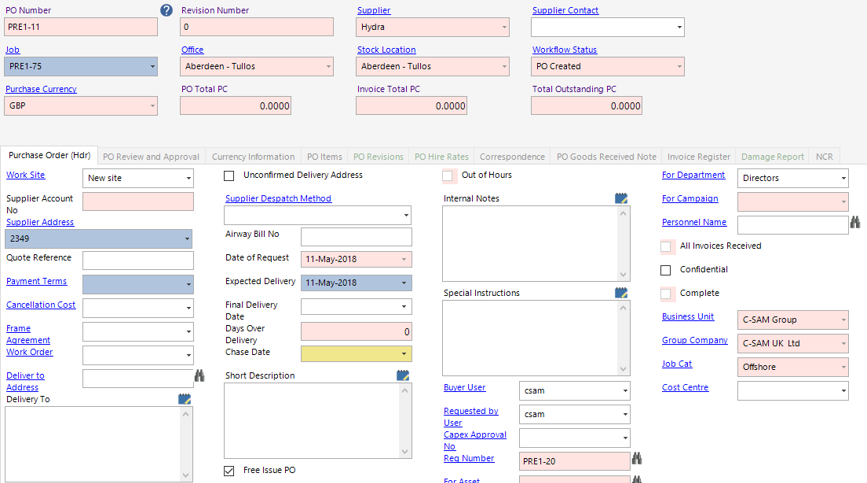
Your screen will now look like this:
How to Send a PO
- Sending the PO.
From the same screen select Print>Purchase Order. This will open a new tab with a preview of the purchase order. You can print or save the PO from here.
You can send the PO directly from the system by selecting Functions>Email PO. As long as you have the email account set up against the contact.
Sending a PO directly from the system will automatically add in a correspondence record.
Printing a PO and sending via outlook will not create a correspondence record, you will need to manually create a correspondence record if you wanted to keep track of when you sent the PO to the supplier.