
How to Add Assets
Users within specific roles have the ability to add assets into the system. This guide will show you step by step how to do this process.
Note: It is always best practice to search the database for the asset first as the asset number may have been added in a different way (for example; KS1 may exist in the database as KS-1)
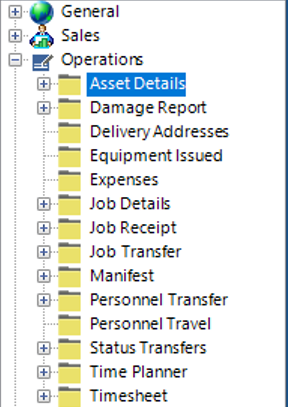
Locate the Assets dataset
- Select Operations, then Asset Details:
- Select New Record>Asset Details or hit Insert on your keyboard.
- Fill in the relevant fields.
Note: (Pink = System Generated, Blue = Mandatory):
| Field | Description |
|---|---|
| Asset Number | This may be System Generated or an Open field depending on your Group Company system set up |
| Category | Select the relevant category (if not in the list add new Category) |
| Equipment Type | Select the relevant equipment type (if not in the list add new Equipment Type) |
| Asset Description | Select the relevant description (if not in the list add new Asset Description) |
| Model | Select the relevant model (if not in the list add new Model) |
| Manf Serial No | Enter the manufacturing serial no (If applicable) |
| Manf Part No | Enter the manufacturing part no (If applicable) |
| Manufacturing Supplier | Select the relevant manufacturing supplier |
| Asset Status | Select the relevant status |
| Asset Details (Hdr) | |
| Old Asset Number | Enter the old asset number (if applicable) |
| Barcode | Enter the barcode number (if applicable) |
| System (Tickbox) | Check this as true if the asset is a Parent Type for a system. Systems consist of Parent and Child assets |
| Third Party Hire | Check this as true if the asset is a third party hire |
| Fixed Asset | Check this as true if classed as a fixed asset |
| Owner Group Company | Select the relevant owner group company |
| Owner Office | Select the relevant owner office |
| Store Group Company | This field should default to the user’s group company, however the field can be amended |
| Store Office | This field should default to the users store office, however the field can be amended |
| Store Stock Location | This field should default to the users store stock location, however, the field can be amended |
| Owner Supplier | Select the relevant owner supplier (If applicable) |
| Owner Client | Select the relevant owner client (If applicable) |
| Origin Country | Select the relevant country (If applicable) |
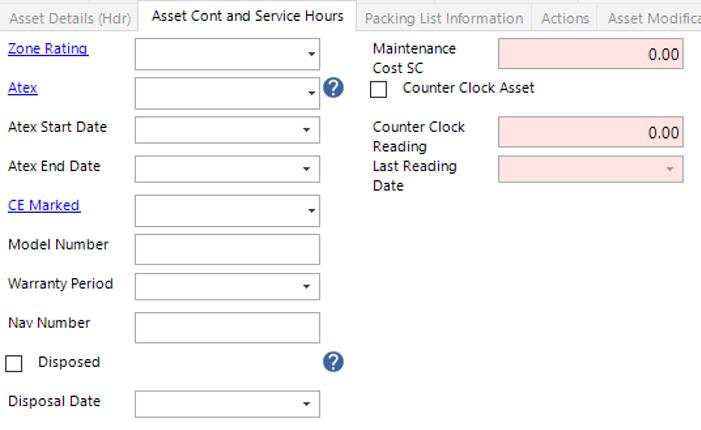
| Zone Rating | Select the relevant zone rating (If applicable) |
| Atex | Select the relevant atex code (If applicable) |
| Atex Start Date | Select the relevant date from the calendar (If applicable) |
| Atex End Date | Select the relevant date from the calendar (If applicable) |
| CE Marked | Select the relevant option (If applicable) |
| Model Number | Enter the model number of the asset (If applicable) |
| Nav Number | Enter the nav number of the asset (If applicable) |
| Depth | Enter the working depth of the asset (If applicable) |
| Insurance Value SC | Enter a currency value (If applicable) |
| Purchased Date | Select the relevant date from the calendar (If applicable) |
| PO Number | Enter the PO Number or use the binoculars to search (If applicable) |
| GRN Number | If the goods are on a goods received note, enter the number |
| Not Functional or Spare (Tickbox) | Check this as true if the asset is non functional or spare |
| Internal Component (Tickbox) | Check this as true if the asset is classed as an internal component |
| Dangerous Goods (Tickbox) | Check this as true if the asset is classed as a dangerous good |
| Asset Folder | The user can link a file/folder/webpage to the asset if lost |
| Notes | Text field to record additional notes |
| Lost (Tickbox) | Check this as true if the asset is lost |
| Lost Report | The user can link a file/folder/webpage to the asset if lost |
| Reason Lost | Text field to record reason the asset is lost |
| Owned By | Select the relevant owned by company |
- Select the Asset Cont and Service Hours tab and fill in the relevant fields, if required:
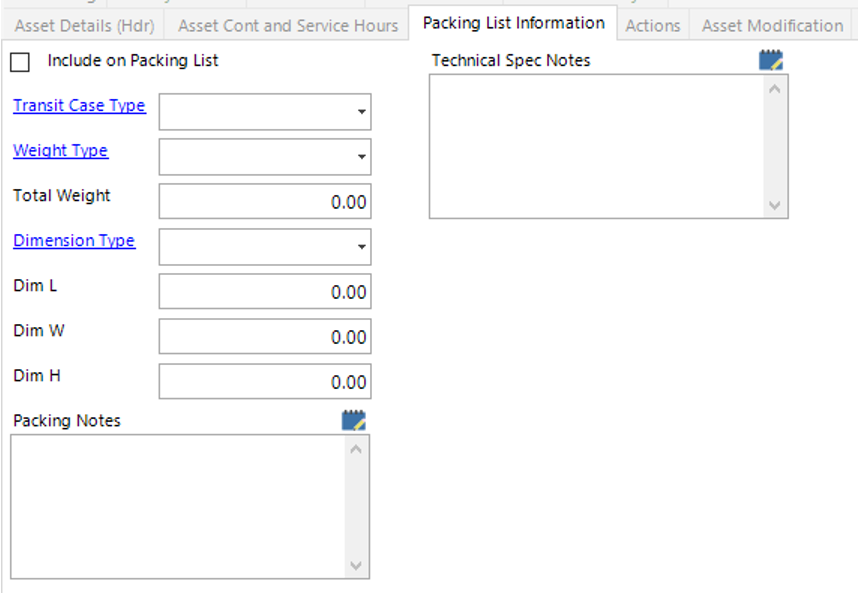
- Select the Packing List Information tab. This tab can be used if the packing is the same every time the asset is shipped, this will save you adding packing details every time you create a manifest for the asset. See How to set up Packing Details user guide for more information:
- Select Save, or Select Close.
The Asset has now been added to the system.
See the following User Guides for additional information: -
How to Add Test History to an Asset
How to Assign Child Assets
How to Create a System
How to Create a Kit