
How to Add Personnel Details
Users within a specific role have the ability to add personnel details into the system.
This can be done via the Job Vacancy dataset (follow Step 1 to Step 7) and the Personnel Details dataset (select Personnel Details dataset, add new and follow Step 8 onwards)
Locate the Job Vacancy Dataset
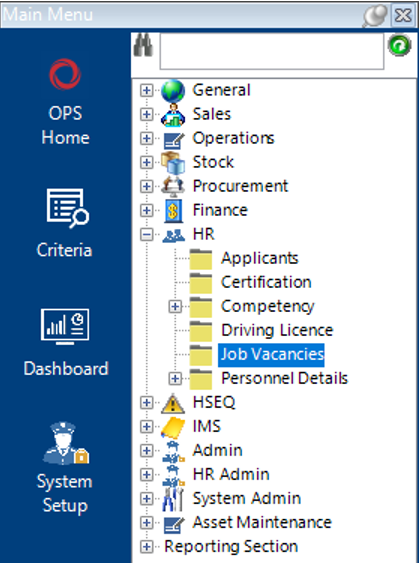
- Select the HR category, then Job Vacancies:
Locate the Job Vacancy
- Enter as much criteria into the search fields as possible and select Search:
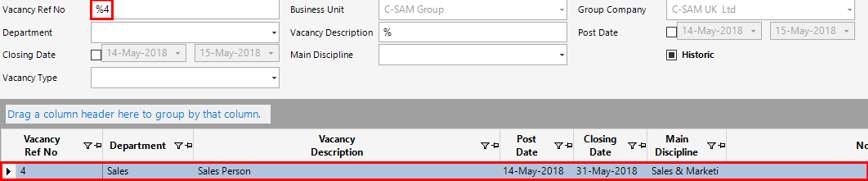
- Open the record by double clicking on the grey box to the left of the Vacancy Ref No column as shown:
Select Applicant(s)
- Select the Applicants tab:

- You can either Open All and use the Next button to search for the correct record, or locate the record from the grid view.
- To open the record, double click on the grey box to the left of the Job Vacancy column as shown:
- Select Functions>Add to Personnel, a new window will appear for New Personnel Details when this function is selected.
- Fill in the relevant fields.
Note: (Pink = System Generated, Blue = Mandatory):
| Field | Description |
|---|---|
| Surname | Automatically populated from the applicant dataset |
| First Name | Automatically populated from the applicant dataset |
| Middle Name | Enter the employee’s middle name (if applicable) |
| Title | Automatically populated from the applicant dataset |
| Known as Name | May shorten Jonathon to Jon for example |
| Availability date | Select the relevant date from the calendar |
| Mobile | Automatically populated from the applicant dataset |
| Personnel Details (Hdr) | |
| DOB | Manually enter or Select from the calendar the date of birth for the employee |
| Nationality | Select the nationality of the employee |
| Contract Type | Select the relevant contract type for the employee |
| Offshore | Select the relevant option |
| Line Manager User | Select the relevant name |
| Department | Select the relevant department |
| Main Discipline | Select the relevant discipline |
| Shift | Select relevant shift type (if applicable) |
| Personnel Supplier | Select only if the employee is hired via a supplier |
| Assessment Phase | Select the relevant assessment phase period |
| Phase Expiry | Select the relevant date from the calendar |
| Sex | Select the relevant one |
| Vantage No | Enter the employee’s vantage number (if applicable) |
| Car Owner (Tickbox) | Check this if the employee has a car |
| CV Date | Select the relevant date from the calendar |
| Home Tel | Enter a telephone number (if applicable) |
| Work Tel | Enter a telephone number (if applicable) |
| Fax | Enter a fax number (if applicable) |
| Other | Enter any other contact tel number/fax/pager |
| Main Email | Enter the main email address for the employee |
| Other Email | Enter an optional email address (if applicable) |
| Nearest Airport | Text field to enter nearest airport details to employee |
| Personnel Folder | This field will populate when the Save function has been run |
| Total Offshore Days Worked | This field will populate whenever the employee is mobilised |
| Competence Level | Select the relevant competence level |
- Select the Sensitive Data tab.
Fill in the relevant fields.
| Field | Description |
|---|---|
| Salary Band | Select the relevant band |
| Current Age | Enter the current age |
| National Insurance No | Enter the NI number for the employee |
| Medical Card No | Enter the medical card no for the employee (if applicable) |
| Allergies or Any Known Illnesses | Text field to hold allergy/illness information |
| Full or Part Time | Select relevant option |
| Employment Start Date | Select relevant date from calendar |
| Probation End Date | Select relevant date from calendar |
| Eligible to Join Pension | This field will populate to the same date as the Probation End Date |
| Date Joined Pension | Select the relevant date from the calendar |
| Leaving Date | Select the relevant date from the calendar |
Select Save.
You will be alerted how many records were added to the Personnel Check List tab (These tasks are set up in the Group Company record against the Personnel Checklist Template dataset):-

- There are many tabs within the Personnel Details dataset, select New Record to view which tabs can have records added against them, or select each tab individually and hit Insert on your keyboard to add a record.
Add Personal Personnel Details
Personnel Addresses
- Select the Personnel Addresses tab, if an address has not populated from an Applicant dataset, select New Record>Personnel Addresses or hit Insert on your keyboard.
Fill in the relevant fields.
Note: (Pink = System Generated, Blue = Mandatory):
| Field | Description |
|---|---|
| Personnel Name | This will automatically populate |
| Personnel Address Type | Select the address type from the drop down |
| Personnel Addresses (Hdr) | |
| Address 1 | Enter the first line of the address |
| Address 2 | Enter the second line of the address |
| Address 3 | Enter the third line of the address |
| City | Enter the city |
| Country | Select the relevant country |
| Postcode | Enter the postcode for the address |
| Phone | Enter the phone details for the address |
| Fax | Enter the fax details for the address |
| Date Address Checked | Select the relevant date from the calendar |
| Date Moved In | Select the relevant date from the calendar |
| Date Moved Out | Select the relevant date from the calendar |
| Use as Personnel Address (Tickbox) | Check this if applicable |
Select Close, the record has now been added to the personnel details record.
Next of Kin
- Select the Next of Kin tab, select New Record>Next of Kin or hit Insert on your keyboard.
Fill in the relevant fields.
| Field | Description |
|---|---|
| Personnel Name | This will automatically populate |
| Contact Type | Select the relevant type |
| Contact Surname | Enter the surname of the contact |
| Contact First Name | Enter the first name of the contact |
| Title | Select the title for the contact |
| Relationship | Enter the relationship details |
| Main Contact Number | Enter the main contact number for the contact |
| Next of Kin (Hdr) | |
| Personnel Address | Select an address from the drop down if contact resides in the same household, this will populate some of the remaining fields |
| Address 1 | Enter the first line of the address |
| Address 2 | Enter the second line of the address |
| Address 3 | Enter the third line of the address |
| City | Enter the city |
| Country | Select the relevant country |
| Postcode | Enter the postcode for the address |
| Second Contact Number | Enter a second number if necessary |
| Third Contact Number | Enter a third number if necessary |
| Email Address | Enter the contacts email address |
| Date of Birth | Enter the contacts DOB |
| Notes | Text field for additional information |
Select Close, the record has now been saved against the Personnel Details.
Bank Details
- Select the Bank Details tab, select New>Bank Details or hit Insert on your keyboard.
Fill in the relevant fields.
Note: (Pink = System Generated, Blue = Mandatory):
| Field | Description |
|---|---|
| Personnel Name | This will automatically populate |
| Currency | Select the relevant currency |
| Bank Details (Hdr) | |
| Bank Name | Enter the name of the relevant bank |
| Branch Name | Enter the name of the branch |
| Address | Enter the address |
| Address 1 | Enter the address |
| Address 2 | Enter the address |
| City | Enter the City |
| Country | Select the country |
| Post Code | Enter the Postcode |
| Sort Code | Enter the sort code |
| Account No | Enter the account number |
| Roll No | Enter the roll number (if applicable) |
| Swift No | Enter the swift number (if applicable) |
| IBAN No | Enter the IBAN number (if applicable) |
| Acc in Name Of | Name of the account holder |
| Account Type | Select the relevant account type |
| Norwegian Tax | Is the account subject to Norwegian tax |
Select Close, the bank details have now been added to the Personnel Details.
Salary Details
- Select the Salary Details tab, select New Record>Salary Details or hit Insert on your keyboard.
Fill in the relevant fields.
Note: (Pink = System Generated, Blue = Mandatory):
| Field | Description |
|---|---|
| Personnel Name | This will automatically populate |
| From Date | Select the relevant date from the calendar |
| To Date | Select the relevant date from the calendar (if applicable) |
| Office | Select the relevant office |
| Job Cat | Select the relevant job category |
| Category Code | Select the relevant category code (if applicable) |
| Salary Details (Hdr) | |
| Department | Select the relevant department |
| Main Discipline | Select the relevant main discipline |
| Pay Frequency | Select the relevant pay frequency (weekly/monthly etc.) |
| Payment Currency | Select the relevant currency |
| Notice Period | Select the relevant notice period |
| Salary | Enter a currency amount (if applicable) |
| Hourly Rate | Enter a currency amount (if applicable) |
| Shift Rate | Enter a currency amount (if applicable) |
| Offshore Day Rate | Enter a currency amount (if applicable) |
| International Day Rate | Enter a currency amount (if applicable) |
| On Call Rate | Enter a currency amount (if applicable) |
| Overtime Rate | Enter a currency amount (if applicable) |
| Sunday Rate | Enter a currency amount (if applicable) |
| Fuel Card (Tickbox) | Check this if the person is entitled to a fuel card |
| Part Time (Tickbox) | Check this if the person is part time |
| Car Allowance | Enter a currency amount (if applicable) |
| ER Pension Contribution | Enter a currency amount if the person is in the company pension scheme |
| Details | Text field for additional details |
| Special Rate Comments | Text field for additional details |
| Contract Issued | Select the date from the calendar |
| Contract Returned | Select the date from the calendar |
| JD PS Issued | (Job Description Person Specification), select the date from the calendar |
| JD PS Returned | Select the date from the calendar |
Select the Salary Details Breakdown tab and enter a % amount against the Accrued Holiday Pay % if applicable.
Select the Salary Review tab, hit Insert and fill in the relevant fields to add in any reviews which have taken place regarding salary for the employee, see How to Add and Amend Salary Details User Guide for more information.
Select Close, the record has now been saved against the Personnel Details.
Other Disciplines
- Select the Other Disciplines tab (this is used to keep a record of historical disciplines the employee may have against their career), select New Record>Other Disciplines or hit Insert on your keyboard.
Fill in the relevant fields.
Note: (Pink = System Generated, Blue = Mandatory):
| Field | Description |
|---|---|
| Personnel Name | This will automatically populate |
| Discipline | Select the relevant discipline to add to show historical career |
| Start Date | Select the relevant start date |
| End Date | Select the relevant end date |
| Other Disciplines (Hdr) | |
| Notes | Text field to contain additional information |
| Business Unit | May be defaulted, if not, select the relevant business unit |
| Group Company | May be defaulted, if not, select the relevant group company |
Company Benefits
- If the employee is entitled to company benefits, the details can be added within the Benefits tab. Select the Benefits tab then select New Record>Benefits or hit Insert on your keyboard.
Fill in the relevant fields.
Note: (Pink = System Generated, Blue = Mandatory):
| Field | Description |
|---|---|
| Personnel Name | This will automatically populate |
| Benefit Type | Select the relevant benefit type |
| Unique Number | Enter the unique benefit reference number (if applicable) |
| Active (Tickbox) | Check this if the benefit is active |
| Benefits (Hdr) | |
| Date of Issue | Select a date from the calendar (if applicable) |
| Expiry Date | Select a date from the calendar (if applicable) |
| Benefit Description | Text field to record additional information pertaining to the Benefit |
| Notes | Text field for additional notes |
| PIP % | (Personal Independence Payment) Enter the % amount (if applicable) |
| PIP Company | Enter the % amount (if applicable) |
| PIP Divisional | Enter the % amount (if applicable) |
| PIP Individual | Enter the % amount (if applicable) |
Select Close from the toolbar, the benefits record has now been added
Equipment
- If the employee has equipment assigned to them, select the Equipment Issued tab, select New Record>Equipment Issued or hit Insert on your keyboard.
Fill in the relevant fields.
Note: (Pink = System Generated, Blue = Mandatory):
| Field | Description |
|---|---|
| Personnel Name | This will automatically populate |
| Equipment Description | Select the relevant equipment description |
| Unique Number | Enter the equipment number (if applicable) |
| Equipment Issued (Hdr) | |
| Date of Issue | Select the relevant date from the calendar |
| Size | Enter the size (if applicable) |
| Equipment Details | Text field to record equipment details |
| Notes | Text field to record additional notes |
Select Close, the equipment has now been added to the personnel details.
Shifts
- Select the Shift Patterns tab, there may be a record already created, if so, open the record and amend as required. If not, select New Record>Shift Pattern or hit Insert on your keyboard.
Fill in the relevant fields.
Note: (Pink = System Generated, Blue = Mandatory):
| Field | Description |
|---|---|
| Personnel Name | This will automatically populate |
| Work Day Start Time | Enter time value |
| Word Day End Time | Enter time value |
| Shift Patterns (Hdr) | |
| Monday-Sunday (Tickboxes) | Check the days the employee will work |
| Notes | Text field to record additional notes |
Note: You can add in multiple records for shifts (for example, Monday-Friday is 9-5, Saturday may be 7-11).
Select Close, the shift patterns have now been added to the personnel details.
Personnel Check List
- Select the Personnel Check List tab. There may be records already in place (set up against the Group Company), if so open each one and fill in the relevant fields.
Note: (Pink = System Generated, Blue = Mandatory):
| Field | Description |
|---|---|
| Date Completed | Select the date from the calendar |
| Item Received (Tickbox) | Check this if the item has been received |
| Notes | Text field to record additional notes |
Select Close, the personnel check list has been updated.
Medical
- Select the Confidential Medical tab, select New Record>Confidential Medical or hit Insert on your keyboard.
Fill in the relevant fields.
Note: (Pink = System Generated, Blue = Mandatory):
| Field | Description |
|---|---|
| Personnel Name | This will automatically populate |
| Medical Type | Select the relavant medical type |
| Medical Date Time | Select the date time from the calendar |
| Expiry Date | Select the date from the calendar (if applicable) |
| Follow up Required (Tickbox) | Check this as true if a follow up is required |
| Follow up Date | Select the date from the calendar (if applicable) |
| Confidential Medical (Hdr) | |
| Medical Supplier | Select the relevant supplier |
| Document | A document pertaining to the medical can be linked to the record via a file/folder/webpage |
| Notes | Text field to record additional information |
| Historic (Tickbox) | Check this as true if the record is historic |
Select Close, the confidential medical record has been added.
Driving Licence
- Select the Driving Licence tab, select New Record>Driving Licence or hit Insert on your keyboard.
Fill in the relevant fields.
Note: (Pink = System Generated, Blue = Mandatory):
| Field | Description |
|---|---|
| Personnel Name | This will automatically populate |
| Driving Licence Type | Select the relavant type |
| Driving Licence Number | Enter the driving licence number |
| Expiry Date | Select the relevant date from the calendar |
| Driving Licence (Hdr) | |
| Date Received | Select the date the licence was received into HR |
| Date Checked | Select the date the licence was checked by HR |
| Notes | Text field to record additional notes |
| Driving Licence | A copy of the licence can be linked via a file/folder/webpage |
Select Close, the driving licence has now been added.
Passport
- Select the Passport Details tab, select New Record>Passport Details or hit Insert on your keyboard.
Fill in the relevant fields.
Note: (Pink = System Generated, Blue = Mandatory):
| Field | Description |
|---|---|
| Personnel Name | This will automatically populate |
| Passport Number | Enter the passport number |
| Issue Country | Select the relevant country |
| Passport Expiry Date | Select the relevant date from the calendar |
| Passport Details (Hdr) | |
| Issue Date | Select the relevant date from the calendar |
| Place of Issue | Enter the place of issue |
| Notes | Text field to record additional notes |
| Doc Link | A copy of the passport can be linked via a file/folder/webpage |
| Historic (Tickbox) | Check this as true if the passport has expired |
Note: You can select the visa details tab from this screen and add records, or select Close and select the Visa Details tab Step 23, one will update the other.
Select Close, the Passport Details have now been added.
Visa
- Select the Visa Details tab, select New Record>Visa Details or hit Insert on your keyboard.
Fill in the relevant fields.
Note: (Pink = System Generated, Blue = Mandatory):
| Field | Description |
|---|---|
| Personnel Name | This will automatically populate |
| Passport | Select the relevant passport |
| Visa Details (Hdr) | |
| Issue Country | Select the relevant issue country |
| Visa Valid From Date | Select the relevant date from the calendar |
| Visa Expiry Date | Select the relevant date form the calendar |
| Visa Details | Text field to record visa details |
| Notes | Text field to record notes |
| Doc Link | A copy of the visa page can be linked via a file/folder/webpage |
| Historic (Tickbox) | Check this if the visa has expired |
Select Close, the visa detail has now been added.
Holiday Entitlement
- Select the Holiday Entitlement tab, there may be a record already present, if so open the record and amend if required. If not, select New Record>Holiday Entitlement or hit Insert on your keyboard.
Fill in the relevant fields.
Note: (Pink = System Generated, Blue = Mandatory):
| Field | Description |
|---|---|
| Personnel Name | This will automatically populate |
| Effective Year | Select the year if not already populated |
| Description | Enter the holiday entitlement description if not already populated |
| Holiday Entitlement (Hdr) | |
| Department | This will automatically populate |
| Annual Entitlement | Enter the annual entitlement for the employee |
| Days Carried Over | Enter the amount of days carried over (if applicable) |
| Lieu Days | Enter the amount of days in lieu (if applicable) |
| Notes | Text field to record additional notes |
Select Close, the holiday entitlement has now been added.
Note: The Timeplanner tab does not require updating, this will populate if and when the employee is mobilised.
Absence Management
- Select the Absence Management tab to enter absence records for the employee, select New Record>Absence Management or hit Insert on your keyboard.
Fill in the relevant fields.
Note: (Pink = System Generated, Blue = Mandatory):
| Field | Description |
|---|---|
| Start Date | First date the employee is absent from |
| End Date | End date the employee is absent to |
| No of Days | Enter the amount of days in total the employee was absent for |
| Absence Type | Select the relevant absence type |
| Notes | Text field to record additional notes |
| Doctor line received (tickbox) | Check this as true if a doctor’s line was received |
| Self certification Received (tickbox) | Check this as true if the employee self certified |
| Result of Injury at work (tickbox) | Check this as true if the absence is due to a work related injury |
| Doc Link | A document can be linked to the absence record via file/folder/webpage |
Personnel Correspondence
Select the Personnel Correspondence tab to add details of communications from HR to the employee, select New Record>Personnel Correspondence or hit Insert on your keyboard.
Fill in the relevant fields.
Note: (Pink = System Generated, Blue = Mandatory):
| Field | Description |
|---|---|
| Personnel Name | This will automatically populate |
| Responsible User | This will default to the user logged in, can be changed |
| Correspondence Status | This will default to Open, can be changed |
| HR Correspondence Type | Select the relevant type |
| Personnel Correspondence (Hdr) | |
| Subject | Enter the subject title |
| Correspondence Link | Link a file/folder/webpage |
| Start Date Time | Select the relevant start date time from the calendar |
| End Date Time | Select the relevant end date time from the calendar |
| Correspondence Notes | Text field to record correspondence notes |
| Next Correspondence | Select the relevant date from the calendar (if applicable) |
Note: The user can select Functions>Email to send communication to the employee via outlook.
Select Close, the absence record has now been added.
Personnel Appraisal
- Select the Personnel Appraisal tab to enter Appraisal information against the employee. Select New Record>Personnel Appraisal or hit Insert on your keyboard.
Fill in the relevant fields.
Note: (Pink = System Generated, Blue = Mandatory):
| Field | Description |
|---|---|
| Personnel Name | This will automatically populate |
| Appraisal Type | Select the relevant type from the drop down menu |
| Department | This will automatically populate |
| Main Discipline | This will automatically populate |
| Time in Position | Enter the relevant value |
| Length of Service | Enter the relevant value |
| Appraisal Due | Enter/Select the relevant date from the calendar |
| Personnel Appraisal (Hdr) | |
| Location | Enter the relevant location the appraisal is or will be carried out |
| Appraisal Venue | Enter the relavant venue where the appraisal is or will be carried out |
| Appraisal User | Select the relevant user name |
| Line Manager User | This will automatically populate, can be changed if required |
| Period Cover | Enter the relevant period cover value |
| Appraisal Date | Enter/Select the relevant date the appraisal was carried out |
| Next Due Date | This will automatically populate when the appraisal date is entered |
| Comment | Text field to contain additional information |
| Document | The user can link a file/folder/webpage to the record |
When the Appraisal is complete, select Functions>Complete Appraisal.
Appraisals due will also show on the User Dashboard.
Select Close, the appraisal record has now been added.
Disciplinary
- If the employee is subjected to a Disciplinary process, select the Disciplinary tab, select New Record>Disciplinary or hit Insert on your keyboard.
Fill in the relevant fields.
Note: (Pink = System Generated, Blue = Mandatory):
| Field | Description |
|---|---|
| Personnel Name | This will automatically populate |
| Disciplinary Type | Select the relevant type from the drop down menu |
| Disciplined by User | Select the relevant user name |
| Disciplinary Date | Enter/Select the relevant date |
| Follow up Required | Enabling this tickbox means that a follow up is needed |
| Reason for Disciplinary | Text field to contain the nature of the disciplinary |
| Letter Sent | Enabling this tickbox indicates that HR have sent a formal letter to the employee regarding the disciplinary |
| Documents | The user can link a file/folder/webpage to the record |
| Notes | Text field to contain additional information |
| Business Unit | May be defaulted, if not select the relevant business unit |
| Group Company | May be defaulted, if not select the relevant group company |
Select Close, the disciplinary record has now been added.
Education & Training
- To add Education & Training information the Personnel record, select the Education and Training tab, select New Record>Education and Training or hit Insert on your keyboard.
Fill in the relevant fields.
Note: (Pink = System Generated, Blue = Mandatory):
| Field | Description |
|---|---|
| Personnel Name | This will automatically populate |
| Personnel Cert Type | Select the relevant cert type or add a new one if required |
| Personnel Cert Sub Type | Select the relevant cert sub type or add a new one if required |
| Status | Select the relevant status |
| Department | This will automatically populate |
| Discipline | This will automatically populate |
| Job Number | If the cert relates to a specific job, enter the relevant number or use the binoculars to search the system Education and Training (Hdr) |
| Valid from Date | Enter/Select the relevant date |
| Expiry Date | This will automatically populate when the valid from date is entered |
| Training Objective | Select the relevant option from the drop down menu if required |
| Benefits | Select the relevant benefit from the drop down menu if required |
| Cert Link | The user can link a file/folder/webpage to the record |
| Cert Pending | Enabling this tickbox indicates that HR have yet to receive the certificate |
| Evaluation Received | Enabling this tickbox indicates that HR has received the evaluation |
| Include in CV Summary | Enabling this tickbox will allow the record to show on the employee’s CV summary record |
| Notes | Text field to contain additional information |
You do not need to enter any information on the Timeplanner tab as this will be updated as and when the employee is mobilised.
Select Close from the toolbar, the education and training record has now been added.
Notes
- To add additional notes to the employee’s Personnel Details record, select the Personnel Notes tab, select New Record>Personnel Notes or hit Insert on your keyboard.
Fill in the relevant fields.
Note: (Pink = System Generated, Blue = Mandatory):
| Field | Description |
|---|---|
| Note Date | Enter/Select the relevant date |
| Notes | Text field to contain notes regarding the employee |
| Business Unit | May be defaulted, if not select the relevant business unit |
| Group Company | May be defaulted, if not select the relevant group company |
Select Close, the notes record has now been added.
Travel
- To add Personnel Travel, see How to Add Personnel Travel to a Job User Guide.
External Work History
- To add External Work History, select the External Work History tab, select New Record>External Work History or hit Insert on your keyboard.
Fill in the relevant fields.
Note: (Pink = System Generated, Blue = Mandatory):
| Field | Description |
|---|---|
| Personnel Name | This will automatically populate |
| From Date | Enter/Select the relevant date |
| To Date | Enter/Select the relevant date |
| External Work History (Hdr) | |
| Include In CV Summary | Enabling this tickbox will allow the record to show on the employee’s CV summary record |
| Contractor | Enter Yes or No |
| Equipment Type | Select the relevant equipment type if required |
| Equipment Details | Text field to contain additional information regarding a specific equipment type the employee has previous experience with |
| Job Title | Text field to contain previous job title |
| End Client | Select the relevant end client if required |
| Work Site | Select the relevant work site if required |
| Description | Text field to contain additional information regarding the work history |
Select Close, the External Work History record has now been added.
Exit Interview
- To add an exit interview record against an employee, select the Exit Interview tab, select New Record>Exit Interview or hit Insert on your keyboard.
Fill in the relevant fields.
Note: (Pink = System Generated, Blue = Mandatory):
| Field | Description |
|---|---|
| Personnel Name | This will automatically populate |
| Exit Interview (Hdr) | |
| Department | This will automatically populate |
| Main Discipline | This will automatically populate |
| Interview Date | Enter/Select the relevant date of the interview |
| Main Reason for Leaving | Select the relevant reason from the drop down menu or add a new one if required |
| Exit Reason | Text field to contain additional information on the reason for leaving |
| Interviewer User | Select the relevant user |
| Re Employ | Enabling this tickbox indicates that the company would re employ the person if they applied for another job within the company |
| Notes | Text field to contain additional information |
| Documents | The user can link a file/folder/webpage to the record |
| Business Unit | May be defaulted, if not select the relevant business unit |
| Group Company | May be defaulted, if not select the relevant group company |
Select Close from the toolbar, the exit interview record has been added.
Certification
- To add certification records in against an employee, select the Certification tab, select New Record>Certification or hit Insert on your keyboard.
Fill in the relevant fields.
Note: (Pink = System Generated, Blue = Mandatory):
| Field | Description |
|---|---|
| Personnel Name | This will automatically populate |
| Personnel Cert Type | Select the relevant cert type from the drop down menu or add a new one if required |
| Personnel Cert Sub Type | Select the relevant cert sub type from the drop down menu or add a new one if required |
| Valid From Date | Enter/Select the relevant date |
| Expiry Date | This will automatically update when the valid from date is entered and the record is saved |
| Cert Supplier | Select the relevant supplier if required |
| Cert Number | Enter the cert number if required |
| Certification (Hdr) | |
| Include In CV Summary | Enabling this tickbox will allow the record to show on the employee’s CV summary record |
| Cert Pending | Enabling this tickbox indicates that HR have yet to receive the certificate |
| Evaluation Received | Enabling this tickbox indicates that HR has received the evaluation |
| Cert Status | Select the relevant status from the drop down menu |
| Cert | The user can link the cert via a file/folder/webpage if required |
| Notes | Text field to contain additional information |
| Department | This will automatically populate |
| Discipline | This will automatically populate |
| Time Planner No | If the cert is linked to a specific time planner, you can enter the relevant number or use the binoculars to search for the correct record |
| Business Unit | May be defaulted, if not select the relevant business unit |
| Group Company | May be defaulted, if not select the relevant group company |
| Historic | Enabling this checkbox indicates that the cert has expired |
| Cost Currency | If there is a cost involved, select the relevant currency |
| Cost CC | If there is a cost involved, enter the value |
Select Close, the certificate has now been added.
Client Feedback
- To add Client Feedback, select the Client Feedback tab, select New Record>Client Feedback or hit Insert on your keyboard.
Fill in the relevant fields.
Note: (Pink = System Generated, Blue = Mandatory):
| Field | Description |
|---|---|
| Personnel Name | This will automatically populate Client Feedback (Hdr) |
| Client | Select the relevant client |
| Doc Link | You can link a file/folder/webpage to the record |
| Notes | Text field to contain information regarding the feedback |
| Business Unit | May be defaulted, if not select the relevant business unit |
| Group Company | May be defaulted, if not select the relevant group company |
Select Close, the client feedback record has now been added.
Competency Assessment
- To add a competency assessment, select the Competency Assessment tab, select New Record>Competency Assessment or hit Insert on your keyboard.
Fill in the relevant fields.
Note: (Pink = System Generated, Blue = Mandatory):
| Description | Field |
|---|---|
| Personnel Name | This will automatically populate |
| Competency | Select the relevant competency type from the drop down |
| Competency Task | Select the relevant competency task from the drop down |
| Assessor Personnel | Select the relevant name from the drop down if applicable |
| External Assessor | Enter the relevant external assessor if applicable |
| Date of Assessment | Enter/Select the relevant date |
| Completed | Enabling this tickbox indicates that the assessment is complete |
| Competency Assessment (Hdr) | |
| Include on CV Summary | Enabling this tickbox will allow the record to show on the employee’s CV summary record |
| Comments | Text field for additional information |
| Business Unit | May be defaulted, if not select the relevant business unit |
| Group Company | May be defaulted, if not select the relevant group company |
Select Close, the competency assessment record has been added.
Software Experience
- If you wish to add software experience to the personnel record, select the Equipment Software Experience tab, select New Record>Equipment Software Experience or hit Insert on your keyboard.
Fill in the relevant fields.
Note: (Pink = System Generated, Blue = Mandatory):
| Field | Description |
|---|---|
| Personnel Name | This will automatically populate |
| Equipment Software Experience (Hdr) | |
| Experience Type | Select the relevant type from the drop down or add a new one if required |
| Experience Description | Select the relevant description or add a new one if required |
| Field Experience | Enabling this tickbox indicates that the experience is from the field |
| Workshop Servicing | Enabling this tickbox indicates that the experience is from the workshop |
| Manufacturer Training | Enabling this tickbox indicates that the experience is from the manufacturer |
| Notes | Text field to contain additional information |
| Business Unit | May be defaulted, if not select the relevant business unit Group CompanyMay be defaulted, if not select the relevant group company |
Select Close from the toolbar, the record has now been added.
Expenses
- To add Expenses, see How to Add Expenses User Guide.
Languages
- To add languages to a personnel record, select the Languages tab, select New Record>Languages or hit Insert on your keyboard.
Fill in the relevant fields.
Note: (Pink = System Generated, Blue = Mandatory):
| Field | Description |
|---|---|
| Personnel Name | This will automatically populate |
| Languages (Hdr) | |
| Language | Select the relevant language |
| Grade | Select the relevant grade |
| Notes | Text field to contain additional notes |
| Business Unit | May be defaulted, if not select the relevant business unit |
| Group Company | May be defaulted, if not select the relevant group company |
Select Close from the toolbar, the record has now been added.
Offshore Days
- Offshore Days are calculated from the Timeplanners created against the employee with a type of Onshore or Offshore. You cannot add an Offshore Days record within the Personnel Details record.
Timesheet
- To add a Timesheet record, see the How to Create a Timesheet – Manually User Guide.
Personnel Correspondence
- To add correspondence against an employee, select the Personnel Correspondence tab, select New Record>Personnel Correspondence or hit Insert on your keyboard.
Fill in the relevant fields, or alternatively, drag an email from your email account into the Correspondence Notes field and this will update certain fields within the screen.
Note: (Pink = System Generated, Blue = Mandatory):
| Field | Description |
|---|---|
| Personnel Name | This will automatically populate |
| Responsible User | This will automatically populate to the user logged in |
| Correspondence Status | Select the relevant status |
| HR Correspondence Type | Select the relevant type |
| Personnel Correspondence (Hdr) | |
| Subject | Enter the subject of the correspondence record |
| Correspondence Link | You can link a file/folder/webpage to a record |
| Start Time Date | Select the Start Date of the correspondence |
| End Time Date | Select the End Date of the correspondence |
| Correspondence Notes | Text field to contain addition notes or this field can be used to drag an external email into the system |
| Next Correspondence | Select the relevant date if required |
You also have the ability to Email the correspondence record, select Functions>Email.
Select Yes to send the email from your outlook account or No to send from the system.
Injury Report
- The Injury Report Form tab will populate with records everytime the employee is selected within an Incident Investigation.
Purchase Order
- The Purchase Order tab will populate with records when the employee is selected within the Personnel Name field on a Purchase order.