
How to Create a Timesheet - Manually
Users in a specific job role have the ability to create a timesheet within the database
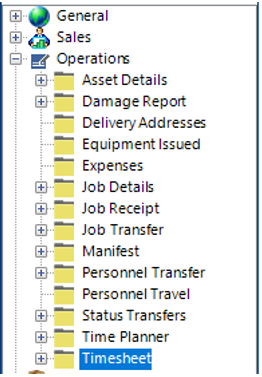
Locate the Timesheet Dataset
- Select Operations, then Timesheet:
Add a Timesheet
- Select New>Timesheet or hit Insert on your keyboard.
- Fill in the relevant fields.
Note: (Pink = System Generated, Blue = Mandatory):
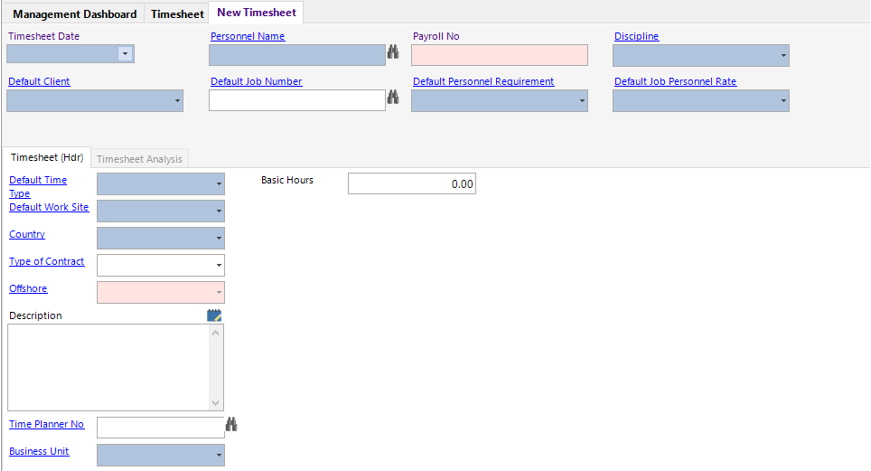
| Field | Description |
|---|---|
| Timesheet Date | Select the relevant date from the calendar |
| Personnel Name | Select the relevant name from the drop down menu |
| Payroll No | This will populate when a name has been selected |
| Discipline | This will populate when a name has been selected, however you can select the relevant discipline from the drop down menu |
| Default Client | Select the relevant client from the drop down menu |
| Default Job Number | Manually type or use the binoculars to search for the relevant job number (if applicable) |
| Default Personnel Requirement | Select the relevant job title from the drop down menu |
| Default Job Personnel Rate | Select the relevant rate from the drop down menu |
| Timesheet (Hdr) | |
| Default Time Type | Select the relevant time type from the drop down menu |
| Default Work Site | Select the relevant work site from the drop down menu |
| Country | Select the relevant country from the drop down menu |
| Contract Type | System Generated |
| Offshore | System Generated |
| Description | Text field for additional information |
| Time Planner No | Manually type or use the binoculars to assign to a time planner (if applicable) |
| Business Unit | Select the relevant business unit |
| Group Company | Select the relevant group company |
| Basic Hours | Enter the hours |
- Select Save, the fields will now change to pink and lock.
- Select the Timesheet Analysis Tab:

- The record added in step 3-4 will show in grid view. Double click on the grey area to the left of the Timesheet Date column to open, or from the toolbar Select Open All.
- The displayed tab allows the user to add additional hours and assign relevant system records if applicable.
Note: (Pink = System Generated, Blue = Mandatory):

| Field | Description |
|---|---|
| Damage Report Number | Manually type the damage report or use the binoculars to search for the relevant record (if applicable) |
| Maintenance No | Manually type the damage report or use the binoculars to search for the relevant record (if applicable) |
| Asset No | Manually type the damage report or use the binoculars to search for the relevant record (if applicable) |
| Work Site | Defaulted from previous screen, can be amended if required |
| Country | Defaulted from previous screen, can be amended if required |
| Basic Hours | Defaulted from previous screen, can be amended if required |
| Overtime Hours | Enter the value of overtime hours (if applicable) |
| Sunday Overtime Hours | Enter the value of sunday overtime hours (if applicable) |
| Shift Hours | Enter the value of shift hours (if applicable) |
| Offshore Rate Hours | Enter the value of offshore rate hours (if applicable) |
| International Day (Tickbox) | Check this if the timesheet relates to an international day |
| On call Day (Tickbox) | Check this if the timesheet relates to an on call day |
| Chargeable (Tickbox) | Check this if the timesheet hours can be back charged |
| Hold from Invoice (Tickbox) | Check this if the timesheet is to be held from the invoice |
| Business Unit | Defaulted from previous screen, can be amended if required |
| Group Company | Defaulted from previous screen, can be amended if required |
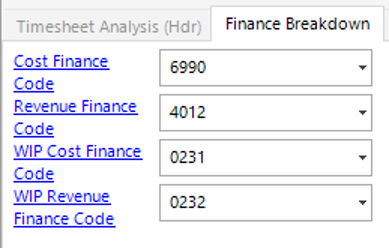
- Select the Finance Breakdown tab to view/edit/assign the relevant codes to the timesheet:
- Select Close.