How to Create Invoices
Invoices are created from the Invoicing Menu within the system.
Please see User Guide How to Create a Pre Invoice Report for more information. Depending on your system setup you may be instructed to run the Pre Invoice Report button before you can run the Create Invoice button in Step 4 of this guide.
Locate the Invoicing Menu
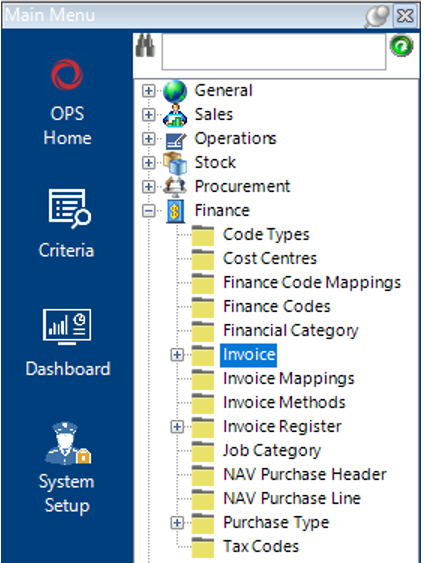
- Select the Finance category, and then Invoice:
- Select Functions>Invoicing Menu.
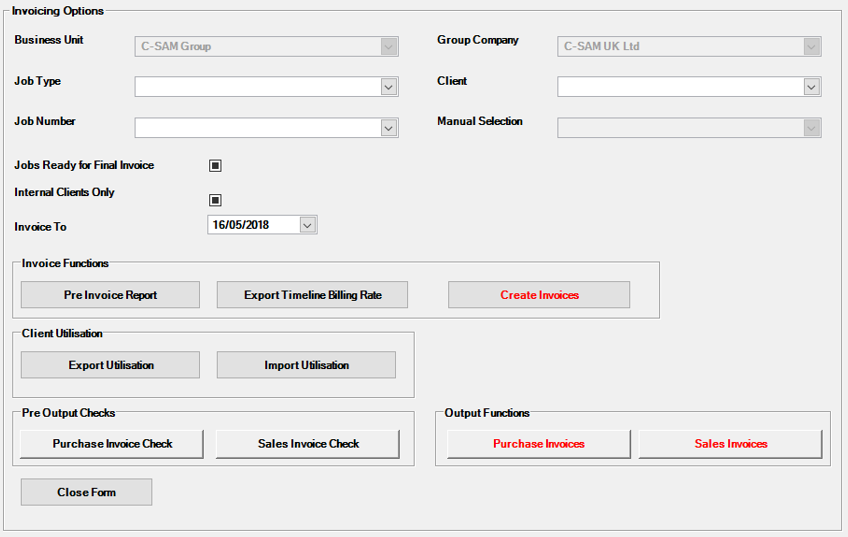
The screen will now look like this:
Create Invoices
- Fill in the relevant fields if required (leaving these blank will pull through all chargeable lines which have not yet been invoiced).
Business Unit & Group Company will be defaulted to the user’s account details.
| Field | Description |
|---|---|
| Job Type | You can select a specific Job Type within this field, i.e. if you select Offshore, the Invoice will only show chargeable lines against a Job Details record which has a Job Type of Offshore and have not yet been invoiced |
| Client | You can select a specific Client within this field, i.e. if you select ABC Demo Client Ltd, the Invoice will only show chargeable lines against a Job Details record which has a Client of ‘ABC Demo Client Ltd’ and have not yet been Invoiced |
| Job Number | You can select a specific Job Number within this field, i.e. if you select Job Number CSAM-18, the Invoice will only show chargeable lines against a Job Details record which has the Job Number of ‘CSAM-618’ and has not yet been invoiced |
| Internal Clients Only | This box is defaulted to capture all jobs, whether they are Internal Clients or not, however you can adjust this to pull through only jobs which are for Internal Clients or not to pull through any for Internal Clients |
| Invoice To | The date selected in this field will be the date your chargeable lines will be invoiced up to and including |
Note: As previously stated in this guide, if all of the above fields and tickboxes are left blank, the system will show all chargeable lines on the Invoice which have not yet been invoiced.
- Select the Create Invoices button from the Invoice Functions section.
- A message will appear and if you have entered specific search criteria into the fields the message will show those within the message.
Select Yes to continue or No to cancel the operation, the system will now run a query in the background to locate the chargeable lines.
- A message will appear to alert the user of the amount of invoices created.
Select OK to continue.
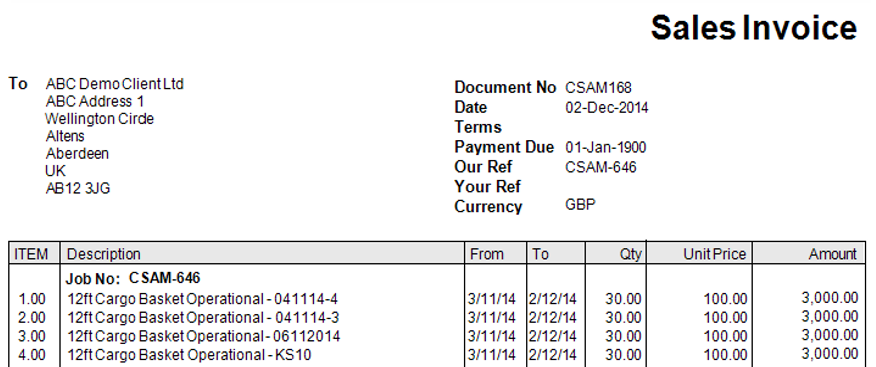
- The Invoices created will now be saved against the Invoice dataset and tied to each Job Details record. To view an Invoice, locate the Job, select the Invoice tab. You will now see all Invoices created against this job, along with any Pro Formas and Credits if created:

- To Print and/or Export the Invoice/Pro Forma/Credit, open the relevant record, select Print>Invoice/Credit from the toolbar.