
How to Create and Complete a Status Transfer
A status transfer can be used to change the Asset Status from one status to another and/or from one Stock Location to another.
For example:
1) From Asset Status ‘Available’ to Asset Status ‘Transfer’

2) From Stock Location ‘Altens’ to ‘Bridge of Don’
This will update the Asset Status field within Asset Details.
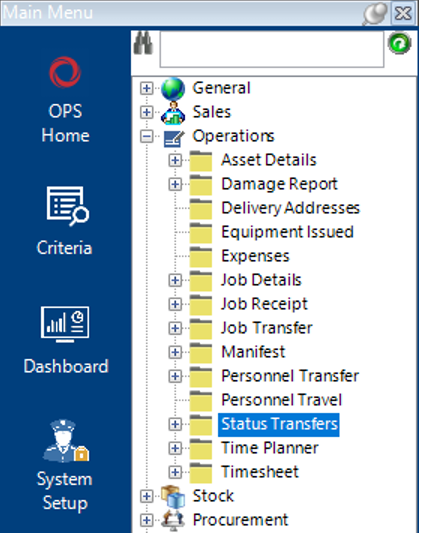
Locate the Status Transfer Dataset
- Select Operations, then Status Transfers:
Create a Status Transfer
- Select New Record>Status Transfers or hit Insert on your keyboard.
- Fill in the relevant fields.
Note: (Pink = System Generated, Blue = Mandatory):
| Field | Description |
|---|---|
| Transfer Date | Select/Enter the relevant date |
| Asset Status | Select the status you wish to assign your assets to |
| Reason | Select the relevant reason for the Status Transfer |
| Status Transfer (Hdr) | |
| From Office | Select the relevant office the Asset(s) currently reside at |
| From Stock Location | Select the relevant stock location the Asset(s) currently reside at |
| To Group Company | Select the relevant group company. If remaining the same you still need to select it as this field is mandatory. |
| To Office | Select the relevant office. If remaining the same you still need to select it as this field is mandatory. |
| To Stock Location | Select the relevant stock location. If remaining the same you still need to select it as this field is mandatory. |
- Select Functions>Select Assets for Transfer, running this function will open the Asset Details search screen.
- Enter the Asset Number you wish to transfer, or using the search fields enter as much criteria as possible and select multiple rows as required. Select Close.
Select Yes to continue or No to cancel the operation.
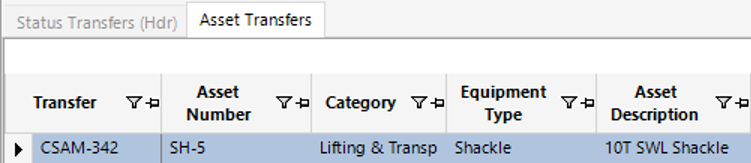
- The system will automatically return you to the Status Transfer (Hdr), select the Asset Transfers tab to view the list of assets allocated to the Status Transfer record.
Complete a Status Transfer
- Select Functions>Complete Status Transfer.
Select Yes to continue or No to cancel the operation.
Select OK.
The Status Transfer is now complete.